How to Install / Register
Follow the steps below to download, install, and register Mr. Accounting for students (matriculation).
1
Step 1
Download and Open The File
Download the Mr. Accounting installer for students.
- Click on the download link (e.g. Download Matriculation from the menu, or the Student Download button below to get the installer first).
You may use other unzip software such as 7-Zip to unzip the file. - Click Download to save the file to your computer.
- Once the file has downloaded, go to your Downloads folder. Right-click the file → Open with → Windows Explorer (or use your preferred unzip tool to extract).
Download link
Student Download1Step-by-step screenshots
1
Select: Download
1 / 4
2
Step 2
Install Mr. Accounting
Run the installer and follow the wizard.
- Double-click to open the software installer.
- Click Next.
- Tick I accept the terms of the license agreement, then click Next.
- Key in your User Name, Company Name, and Software Serial Number, then click Next.
- Click Next (destination folder).
- Click Install.
- Click Finish to complete installation.
- After installation, the Mr. Accounting icon will appear on your desktop. Click the icon to start.
2Step-by-step screenshots
1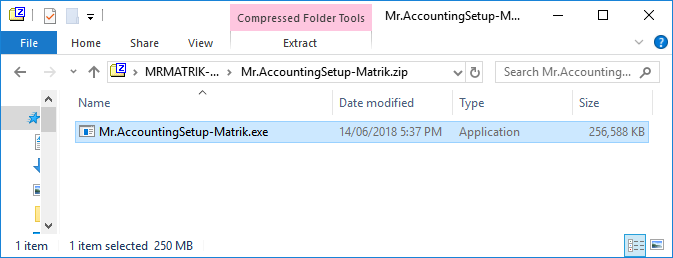
1 / 8
3
Step 3
Create and Register Your Company
Set up your company profile in Mr. Accounting.
Make sure your internet connection is active while registering the company. If registration fails, try turning off your antivirus temporarily and try again.
- Click New Company. (For a new installation, the system will usually open Company Profile directly.)
- Enter Company Details: Company Name (your name), your Matrix No., Address, Telephone No., and Email Address.
- The Financial Period should be set by the system (e.g. 01/01/2019 to 31/12/2019). If it is different, change it to match the period provided for your course.
- When finished, click Save.
- When you see "Company created successfully", click OK.
3Step-by-step screenshots
1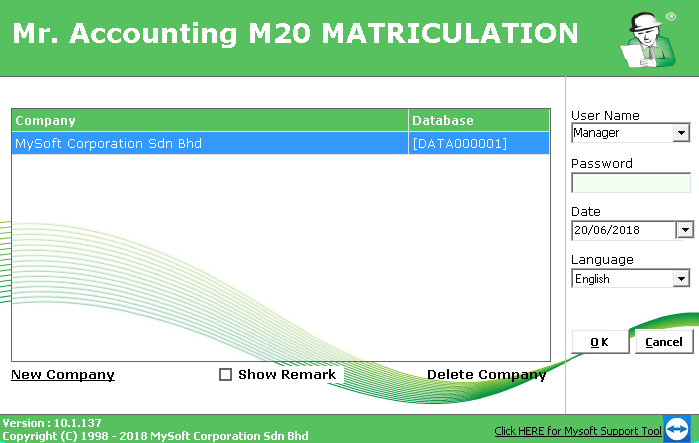
Select: New Company
1 / 3